
an Assistent not limited to conversion of VDR-recordings to DVD-images

first steps with VdrAssistant
After the installation the application parts have to get startet. At the linux-machine, where the serivices shall work, the ServiceManager has to get startet (if the services are distributed on several machines, the ServiceManager needs to get startet at each machine):
 That startscript can be integrated into the servers autostart mechanism - so you don't have to start it manually each time.
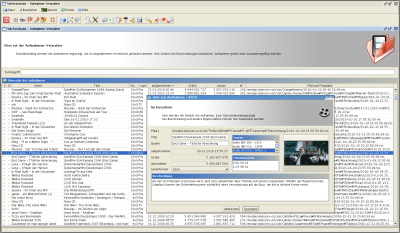
After that, start the command center of VdrAssistant on your desktop. The first time, the application will start with the MDI-Mode, shown at the left. The call is similar to the start of the Java-installer, but the command-center has no release-number in the archive name:
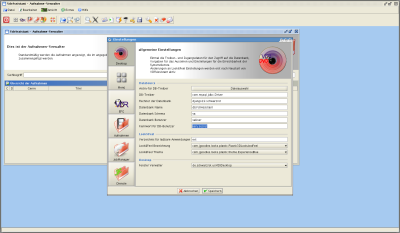 First you probabely want to customize the application according your taste. With Edit/Preferences the applicationwide dialog for customizations opens.
The buttons at the left column show the loaded applications, where Desktop and Services are common to all applications and always loaded. The other buttons depend on the currently loaded applications.
Look&Feel-name and theme can be changed. These settings will be saved as personally data, which means, that different users at the same machine may have different preferences. The settings of Look&Feel, as well as the window manager will be activated at application restart.
Best you take a look at all preferences pages to ensure, that the settings match your tastes.
Finally we change to the services page and check hostnames and arguments of each service. First we'll need to start the Recording-Handler. Select the service and than click on the symbol with the starting rocket.
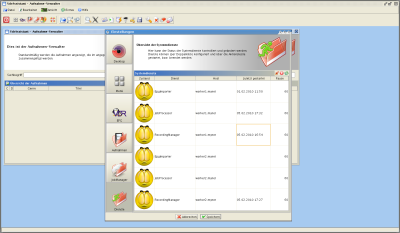
After at least 2 minutes the overview should look like that:
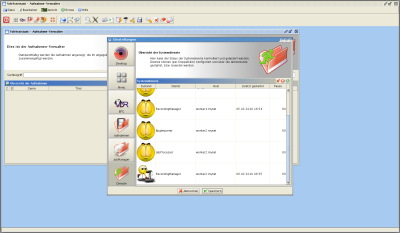
Use double click on list items to open the preferences dialog for that service. Find further informations at applications / dower and at Services.
We close the settings dialog (with OK) and address ourself to the Recording-Managers application.
If that application is not opened already, we start it by selecting it at View/active application. If you change the active application using the MDI-mode, application menue and toolbars will change to reflect the active application.
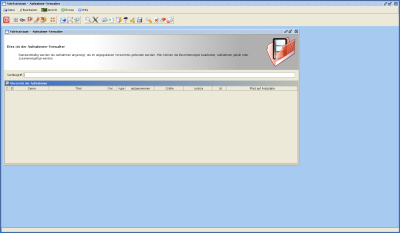
We trigger the recording scan from the recording-manager by selecting Extra/scan for recording or hitting the symbol of the magnifier with the paws (beside load file). The scan will be performed by Recording-Handler system service, which we startet just before. Using the default settings (sleep: 60s) it may last a minute, til the service starts to work. A scan takes about 1-2 minutes - depending on how much HD-recordings exists (common values: 0,5s to scan a PES-recording, 5s for a TS- and about 20s for a HD-recording). After 5 minutes you may trigger the loading of the scanned data. Select File/load or hit the toolbar button with the blue opened folder (beside the magnifier with the paws).
Find further information about the recording manager at the left menue with the same name.
After loading the scanned recordings, their settings may be changed using the detail dialog.
As Windows 7 is not a good environment for java applications, I had to create a new command center. The new one is a browser application, which works together with a backend service. It does not offer the same functionality, but basic tasks can be managed.
But, using a browser application does not mean, that there are no more trouble on window systems. The opposite is true. But this time, few mouseclicks will enable even IE to run the new command center. Default of IE is quite strange - first you have to tell ID 8 to behave like IE 8  .
.
Who ever can understand the mind of M$-creatives ...
At Extras/Developertools you'll get a toolbar at the bottom of the browser window (may open as a separate window). Default of IE is the documentmode "quark" - click on it and select Internet Explorer 8 Standard.
The command center is just a frontend for the Service-Backend, which has to get installed to the 'eager beaver'. The service will be marked as autosart-service, so it starts as soon as "SRServiceManager" will be started.
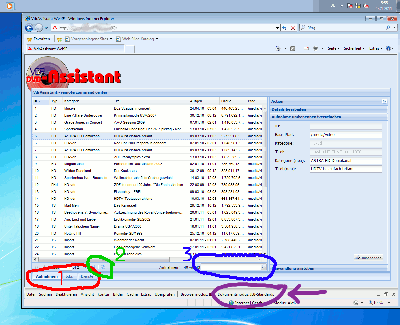
The command center consists of several applications (Label 1), each of it has a list on the left side and an action form on the right side. Most actions depend on an active selection from list - so you need to select a record bevore selecting the action.
As this is my first javascript app, the remote command center is not as sexy as the Java GUI. Mostly important Label 2, where you can refresh the list. You'll have to manually refresh the list after each action performed. In case you forget the refresh, you'll most probabely recieve an concurrency error.
As the list of recordings is expected to be pretty big, there's a search field to filter the list (Label 3). Additionally you can sort each column of the list. Just hit on the title of the column.
The actionforms at the right side are part of an accordion - to change the actionform, just hit on the title of that form.
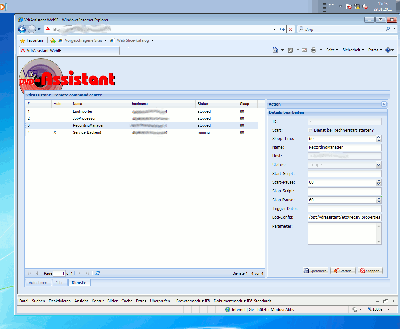
After a fresh installation the list of recordings will be empty. Same is true for the list of jobs. Only services exists at this time.
As you can see, the "Service-Backend" will be noted as running.To get a filled list of recordings, we'll need to start the RecordingManager. So select that service in the list and hit the Start-button. A messagebox pops up to show the the success of the trigger action. Wait a minute to refresh the list. This time the service should be marked as "start requested" or "starting". A minute later, the service should be shown as "running".
So we can trigger the scan of recordings now. We change to Recording-app (Label 1). On the right side you'll see a title bar edit Details. If that is not the active form, hit on the title. Than you'll note a button Scan. Hit on it and after confirming the success message change to the Job-app and hit the refresh-button. You should see a new entry in the list. Status will probabely be 'released'. Wait a minute and hit refresh again. Status should have changed to 'in Work'. You can wait for the service to terminate the job - hit refresh until the status changes to 'success' or 'failure'. An approximate time to scan a recording is about 2s on an SD recording and about 6-10s for a HD recording. Multiplicate it with the number of your recordings and you know the time you'll have to wait. Alternatively you may want to watch the logmessages of the recording manager service.
When the scanjob has been terminated (job status is success or job has been deleted) the list or recordings can be read - so hit the refresh button of the recordings list.
When you save changes of recording details, a job will be created that synchronizes your changes to info-file of the recording. The move/rename recording form has to disabled fields of category and title. Those fields show the segments of the current path of the recording. The editable fiels category (new) and title (new) show the current values from recordings database entry, probabely determined by reading info-file or recording. Basepath is the path without the segements of category and title, which means, if you change base path the recording will be moved to new location (category and title will always be appended to base path).
The recoding of recordings has been changed to support anybodies taste. If you select a recording for recoding, you'll have to select a 'HB preset'. HB stands for handbrake and a preset is just a number of commandline switches. Additionally you'll have to choose an audio selection mode. After hittng OK a recode job will be created. The recoding will be performed by the Job processing service.
Enjoy your trial!
Its always possible, that things don't work as expected. One possible reason is that I made a mistake, another reason could be an inappropriate usage, or ...
So it is important to document a comprehensible application flow. One possibility to achieve that are logfiles.
System services create logfiles by default. Depending on your type of installation, you'll find that logfiles at /var/log/vdrassistant or at ~/logs. Logfiles from command-center GUI have to be enabled first. Use a call like this:
java -jar VdrAssistant.jar -logger org.apache.commons.logging.impl.Jdk14Logger 2> ~/VAGui.log
Please send me that logfile together with informations about your operating system, its version and the java version, you are using. First choice would be an email at the maillist. If you're sure, that its a bug, please create a tracker entry
When you're done checking the recordings, its time to create your own menue-template, or adapt the sample template to suit your needs. See Theme-Editor and Skin-Editor.
When your templates are ready, you may create your first compilation job (see Job-Editor). Last not least, you'll need to start the Job-processor (Edit/preferences/services).
Find further informations about the Job-processor at the left menue with the same name.


